USD
USD EUR
EUR
 AUD
AUD
 GBP
GBP
 JPY
JPY
 CAD
CAD
 AED
AED
 SAR
SAR
Total: $0.00
Taxes and shipping calculated at checkout

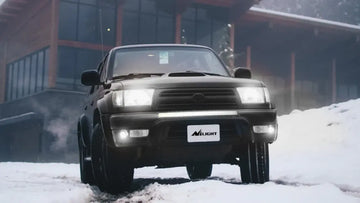
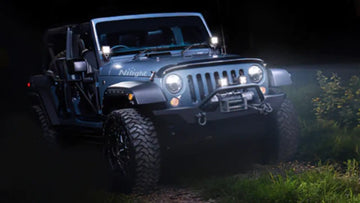
Many off-road owners like to drive to travel, especially through some less populated areas.It's essential to equip your car with a set of high-performance LED light bars to cope with sudden changes in climate. Some SUV owners like the cool style of roof lights. Even if they seldom go wild, When they drive to the suburbs with their friends on the weekend and have a party, turn on the LED roof light at this time and it will illuminate a whole square, which can let them and their friends enjoy the carnival. It is also the standard equipment.

Installing the light bar may be a challenge for some people. Some people may give up the idea of installing the light bar because of the complicated installation steps. Listen to me, here is a simple tutorial to install the light bar of the car, which can make it easy to install your own light bar. Self-installation not only saves the cost of hiring people to install, but also is a very interesting process. After installing the light bar, we can enjoy the night lit by the light bar when we travel. Now let's do it together!
Preparation for Installing Light Bar
1. Unboxing Inspection
When you order a led light bar from Nilight, it comes with a matching nut and bolt kit to help secure it to any vehicle you choose. These external fittings are very important, it may or may not come with some external fittings, it may or may not come with a wiring harness. So you'll need to check each individual light for these parts. You can order a light bar and wire combo kit, because it's more affordable and the wire is specially made for the light bar. If you buy a combo kit, it will contain these things, mounting brackets, specialized harnesses, a LED light bar, a warranty card, a discount card for next purchases or extra gifts.
2. Make sure your car is in ready condition
Turn off the engine and power before installing.Remove the ground terminal first, and then remove the positive terminal.If you have just driven the car, it is necessary to wait for the car to cool down. Make sure it is done in a safe environment.
3. Select the installation position of light bar
According to their favorite style to choose the right LED work lights and light bar. Light bar mainly installed on the top of the car, some shorter size LED light bars, you can install the car at the intake grille.The front and center of the vehicle, or the location of the bumper bars, will make light bar installation easier.
If you want to install smaller LED work lights, they are usually installed in pairs, either on the car's front safety bracket or in front of the rear view mirror. They are generally installed on the roof of 3 to 4 a row, if there is a roof rack, can be installed on the roof rack as well.
Let's get to the point.How to choose the location of the light bar installation is a very critical issue, this time you need to accurately measure the location of the light bar installation, to ensure that they do not have a gap problem, if you want to install the light bar on the roof, then you better know your car height, Because many places now the garage, height limit pole is 2.2 meters or even 2 meters, and the off-road vehicle itself is very tall, coupled with many people and carried on the elevation and modification of large tires, so in the position of the light bar on the roof, it is easy to be high.This will bring a lot of trouble for daily use. A lot of people can't even get into their own underground parking spaces, which is embarrassing.

4. Tools Needed
Electrical Tape
Socket Sets
Drill and Drill bits
Measuring instrument
A pen to mark the location of a hole
Light bar installation
Step 1: Drilling a hole
Step 2: Mounting brackets
Step 3: Wiring harness arrangement
Step 4: Mounting the Switch
Step 5: Connect wires to the light bar and test
Step 6: Double check your work
Step 7: Warm prompt
1. Drilling a hole
It's best to wear goggles when drilling holes. Place a piece of scotch tape over the selected position and mark the holes with a marker on the tape.We will use the correct size bits for this hole, such as a quarter inch drill bit. The reason we use tape is that when we drill holes we produce some plastic or metal drill bits that can scratch the paint or possibly the bumper.This allows us to drill without scratching the paint and without the residue from the sides falling into the hole. After drilling the holes we need to test the fit of the light bar and the bracket assembly to be installed.
Tip: It's best not to drill the roof. If you don't want to use the roof rack, but want to use screws, see that the roof is reserved for the installation of the roof rack interface. If forcibly drilled and installed, there will be water leakage, rust, etc., which will affect the use of the vehicle in the future.
2. Mounting brackets
If you don't need to drill a hole to install your light bar, you can skip this step and directly install the bracket to fix the light bar in the position you want. Different brands of bracket installation may be slightly different, but the difference is not too great. This step should follow the steps in the instruction manual. Generally, the assembly can be completed according to the following steps. Install the bracket with bolts and nuts, use a flat washer under the bolt head, use a flat washer under the nut, and use the lock washer closest to the nut. Most bracket kits come with fasteners and special washers. Be careful not to completely tighten any fasteners to adjust them later.
There are two kinds of bracket mounting methods, one is side mounting, and the screws are directly mounted on the side. The advantage of this installation method is that it is convenient to adjust the angle of the light bar. The other is the base. There is a slider with screw space on the back of the light bar. Screw passes through the base and is installed into the space. The advantage of this mounting method is that the light bar can slide left and right and adjust the position up and down.

3. Wiring harness arrangement
3.1 The position of the wiring harness
First of all, we need to understand how many parts a wiring harness has and what the functions of these parts are. After understanding it, it will be of great help to our wiring harness connection. Usually a harness will have a relay, a switch, a red power wire and a black ground wire (with a ring terminal), a pair of connector wires (negative and positive).

3.2 Laying cable
The first step is to pass the wiring harness through the firewall and leave part of the switch segment in the vehicle. After passing it through, pull it through the rubber cable ring and install it somewhere near the battery so that the power and ground cables can be connected to the battery. You can then install the fusing relay, plug the fuse wherever you like, install the red positive cable directly into the battery or 12 volt circuit, then install the negative cable and attach it to the body ground or battery.
When assembling, do not pull the wire harness too tightly (especially in the transverse arrangement of the wire harness), so as to avoid the movement of the fixed points of the wire harness in the jolting state of the vehicle, resulting in the instantaneous increase of the distance between the two fixed points, thus elongating the wire harness, resulting in the pulling off/virtual connection of the internal contacts of the wire harness, the change of wire parameters, and even wire breaking.
After the assembly of the wire harness, there should be enough clearance around it to ensure that it is not pressed by other parts and not squeezed by other parts and their fasteners. Avoid grounding faults caused by clipping, wear, or rupture of the insulation layer of the cable harness.

Tips:
4. Mounting the Switch
The simpler way is to Install the rocker switch in the desired position in the cockpit, position it with adhesive, and then connect the remaining part of the harness wire to one end of the switch. Sufficient length should be reserved for the connector connecting switch and instrument panel wiring harness. According to the installation depth of the switch, the position of the socket, the direction of the socket opening and the rear space after the switch assembly, according to the convenience of operation, the reserved length of the connector on the wire harness should be appropriately increased.

5. Connect wires to the light bar and test
At this point, we are very close to the successful installation of the light bar. First, connect the wire from the light bar to the relay switch. Connect the red wire of the light to the red wire on the switch, and connect the black wire of the light to the black wire on the switch. After the wires are connected, cover any bare wires with electrical tapes or heat shrinkable tubes to prevent the danger of electric leakage.Then you can turn on the switch to test your light, remember not to be in front of the car, prevent from hurting your eyes.

6. Double check your work
You can adjust the Angle of lights before the power test. The range of LED work lights and LED light bar is around 50-100 meters. To adjust the Angle you need to fit the lighting requirements. Be sure to lock the mounting screws. During normal use, it is necessary to check regularly to see if the screws are loose.

7. Warm prompt
1. Think about how much space you have. Be sure to measure and select the right light bar.
2. Choose a lighting battery that won't drain you. Some brands use more energy than others to produce brighter lights.
3. Look for brands with long warranties. Some offer only six months of coverage, while others offer a two-year warranty, which can give you peace of mind.
Problems that may occur due to nonstandard installation of light bar
The most common problem in the installation process is that there is always current in the circuit due to the wiring error of the harness. This will lead to continuous or intermittent small current flow inside the relay, which will lead to repeated attraction of relay pins and overheat, and then lead to ablation of the whole relay.
Therefore, if there is a harness ablation fault, we should first check the wire diameter and fuse selection. Most of these problems are caused by the fuse that can't protect the wire. Secondly, when timing the arrangement of fuse bars, if conditions permit, try to arrange fuse bars of the same power supply type in similar positions.
Another very important and easily overlooked problem is the winding of bundle tape. Some people don't get good adhesive effect because of dirty hands or nonstandard winding methods when winding bundle tape. This will make the adhesive tape fall off, so that the harness can not be well protected. The correct way is not to touch the end of the tape with your fingers when winding the tape. When you roll the tape, try to be as tight as possible, and it is best to make them overlap. Finally, it is a relatively stable state to wind the tape three times at the end.
Factors affecting the lifespan of light bar
Actually, not only the light bar, but also all LED lights are equally important influencing factors.
First of all, the voltage, a voltage-stable light bar can not only make its service life longer, but also be safer for cars. Imagine that when you turn on the lights, the lights will be particularly bright at once, but after a while, it will return to normal brightness, and it will flash along with the starting frequency of the car engine. I don't think any car owners will like this state.
The second is the temperature. When you use the light for a long time, the temperature of the light is bound to rise. At this time, the heat dissipation function of the light bar is very important. If the heat dissipation of the light bar is not good, the temperature will continue to rise, which will not only affect the life of the light bar, but even burn it out.
Finally, it is waterproof. For the lamps installed in off-road vehicles, waterproof function is very important. Off-road vehicles often drive in some deserted places and often encounter extreme bad weather. After the rain, it is easy to fog inside the lamp shell. After being affected with damp, the lights are easy to short-circuit, so we must pay attention to its waterproof design when choosing the light bar.
Some little knowledge about auxiliary lights
Lux, legal symbol (lx) is the unit of Illuminance. When the luminous flux of an object uniformly illuminated by light in an area of 1 square meter is 1 luminous flux, its illuminance is 1 lux. The illumination suitable for reading and sewing is about 500 lux.
Common size classification of auxiliary lights: round or square rectangle: all are expressed in inches, 1 inch, 3 inch, 5 inch, 6 inch, 7 inch, 9 inch, etc.
Light source: halogen, xenon, LED, laser, halogen, although it has been a long time, is still widely used because of its low price, convenient replacement and low cost;
Advantages of halogen light, Low price, light weight of luminous body, no need of additional starting equipment, simple replacement method, and capability of carrying a large number for standby;
The lightness is obviously lower than other advanced light sources, the service life is short, and the brightness will decrease in the later period of service life.

Xenon has the advantages of gradually decreasing price, long service life, high brightness, low power consumption and wide range of selectable color temperature. Additional starting equipment is needed, compared with halogen, it is more expensive, and the luminophor is troublesome to replace.

Advantages of LEDs, The characteristics of LEDs are basically the same as those of xenon, but they are more compact, so the installation method and appearance will make its arrangement and installation more convenient. Its life is longer, and there is no problem of delayed ignition of xenon.
The advantages of the strip-shaped auxiliary light LED are that it can be made into any length to accommodate more LED illuminants, its brightness is higher, and a reflective bowl with both range and width can be designed at the same time; The disadvantage is that the power consumption is relatively large, and at the same time, the calorific value of the whole light bar is also large, so a large area of heat sink is needed for auxiliary heat dissipation.

You can find more details below these articles:
1. How many amperes does the led light bar consume
2. Fuse sizes for 12v LED lights: Use and Prevention
4. What size wire should I use for my LED light bar
5. My light bar has completely or partially stopped working
6. How to choose the best LED light bar for your vehicle
7. How to Wire a Light Bar with a 5 Pin Rocker Switch
8. Best placement for auxiliary LED lights
9. Why do you need a harness kit for Off-road LED light bars
10. How many watts of good LED light bars are suitable for car use